Online Docs
User can connect to eTask through Excel using Add-in by:
Open Excel application or website, navigate to the right of command ribbon and click eTask icon.
From the Excel sync task pane, click “Get Started” then input your company domain in the Domain field and the API key in the API key field.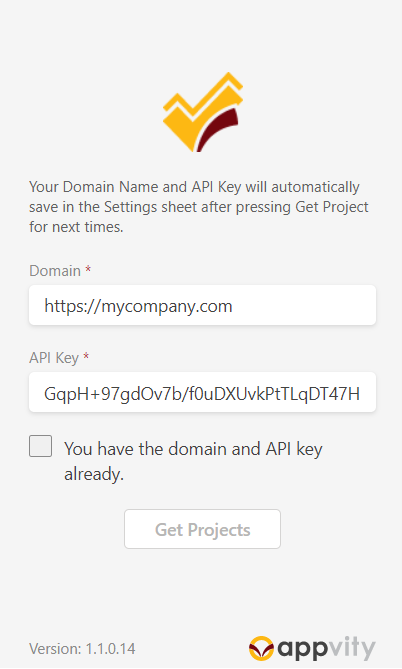
Tick the checkbox “You have the domain and API key already.” then click the Get Projects button.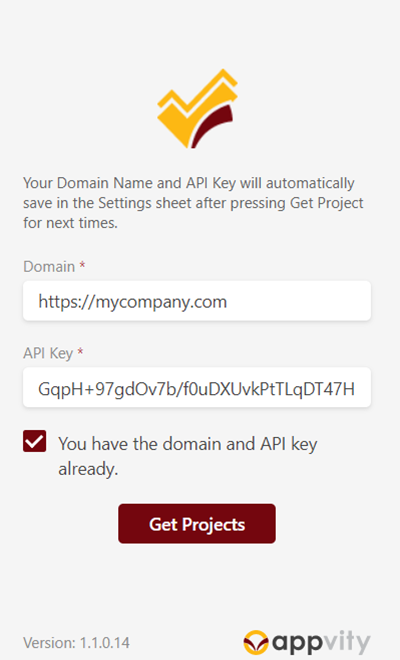
Excel creates a new sheet named “Settings” containing the project you have permission to access.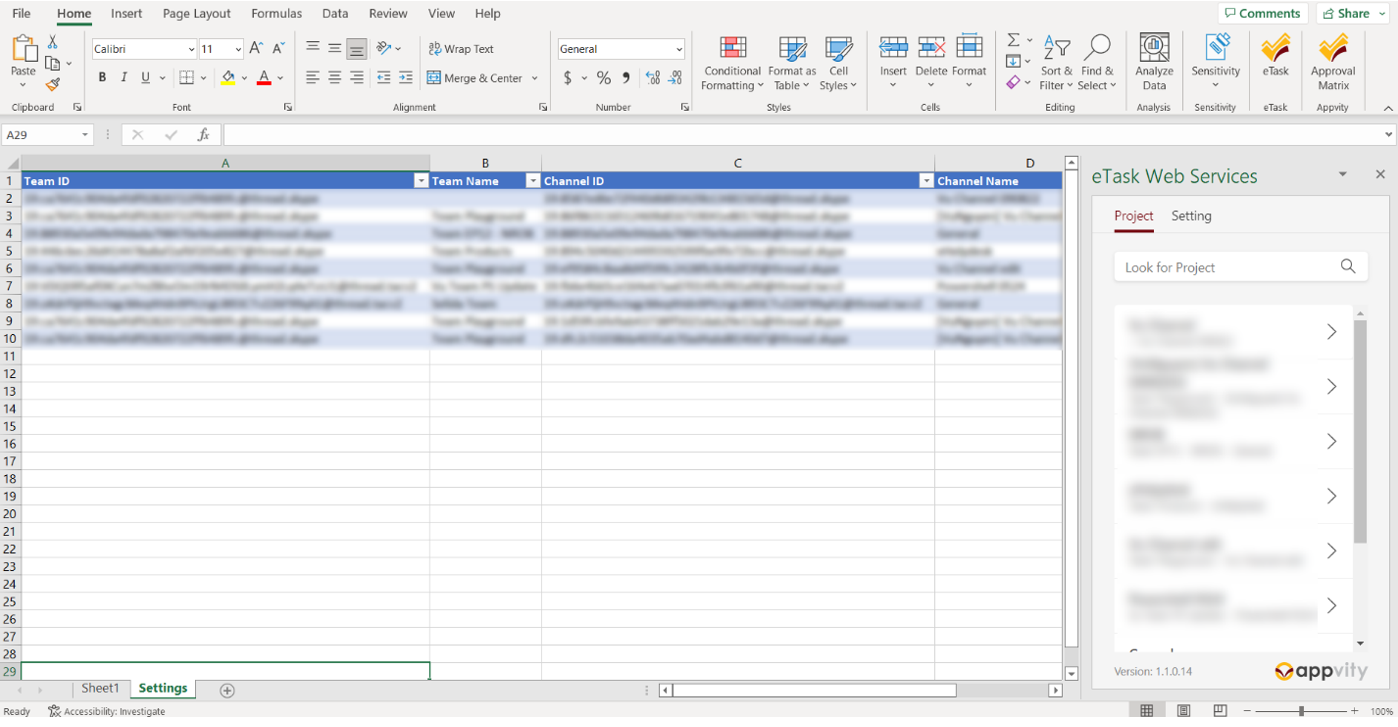
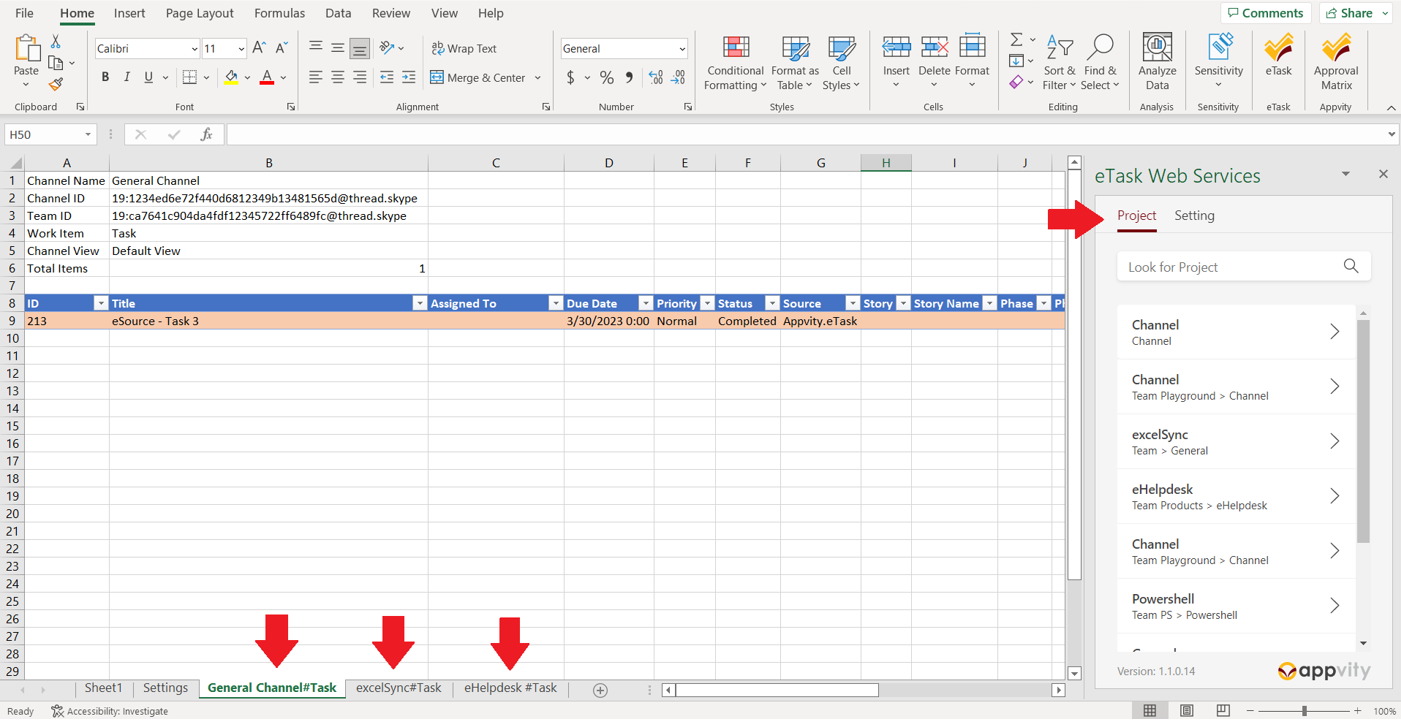
Choose any project from the task pane that you need to work with by clicking the icon “>”. From here, task pane navigate to a project details.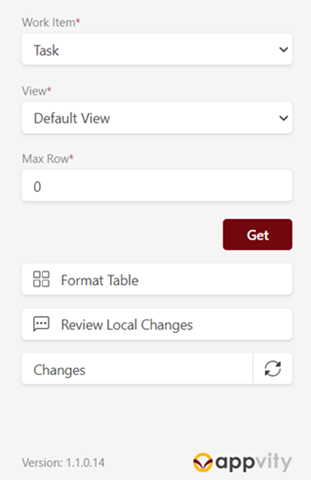
Note: Make sure you are following these Excel sheet naming rules before trying to load data in worksheet:
If your project name contains any of bullet points above, edit your project display name again, then proceed to the next step below.
To display task or bug data from your selected project in Excel, select either “Task” or “Bug” from the dropdown in the Work Item field.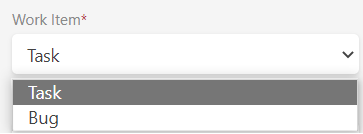
Select available view in selected project from dropdown in View field, or just leave it as Default View.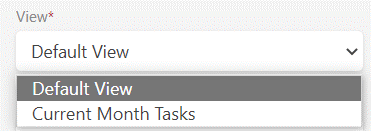
The Max Row field allows you to specify the number of rows of data to be displayed in Excel from your selected project. To display all data from the project in Excel, keep the value at zero. Alternatively, you can input a specific number to display only a certain number of items from the project in Excel.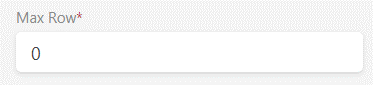
Once you have finished configuring the filter, click the “Get” button. Excel will automatically create a new sheet named after your selected project and Work Item, which will contain the data you configured.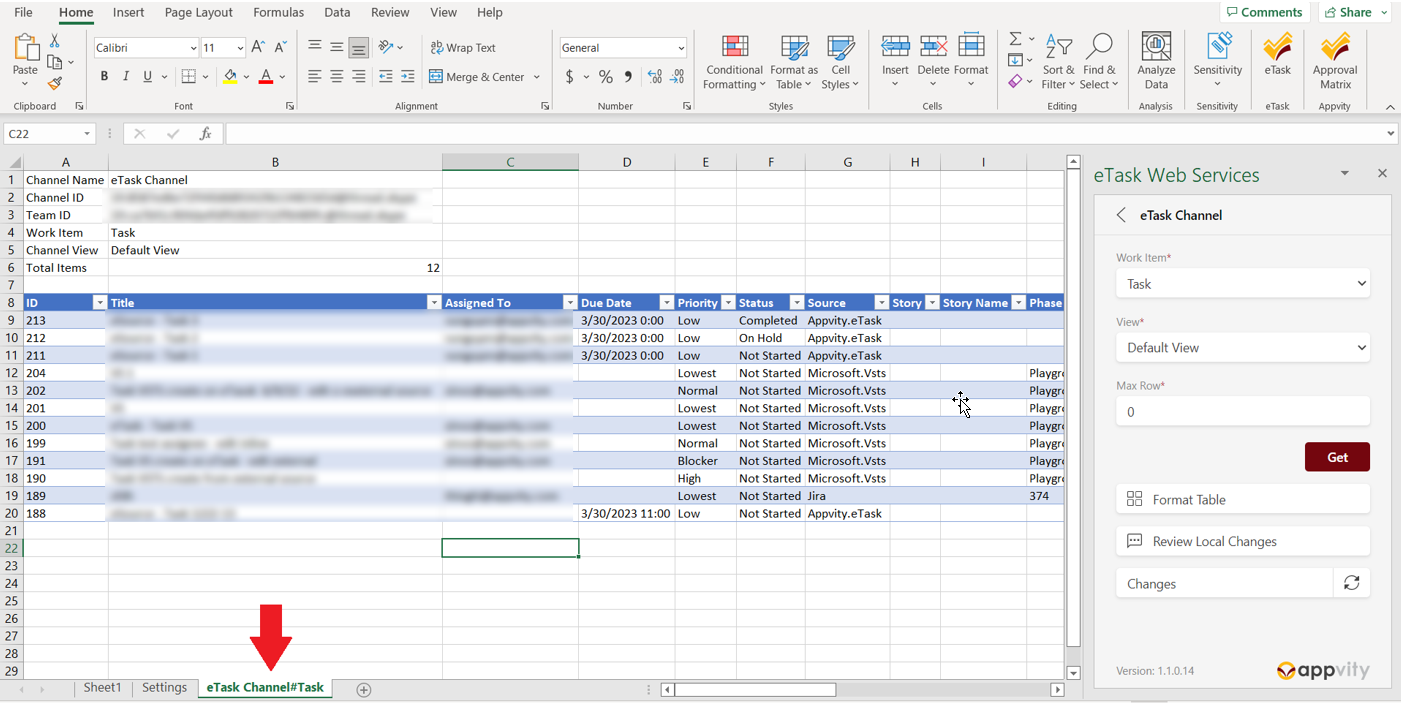
Comment