eTask support collaboration by synchronizing different sources and centralize data into eTask so organization can work together without any concern.
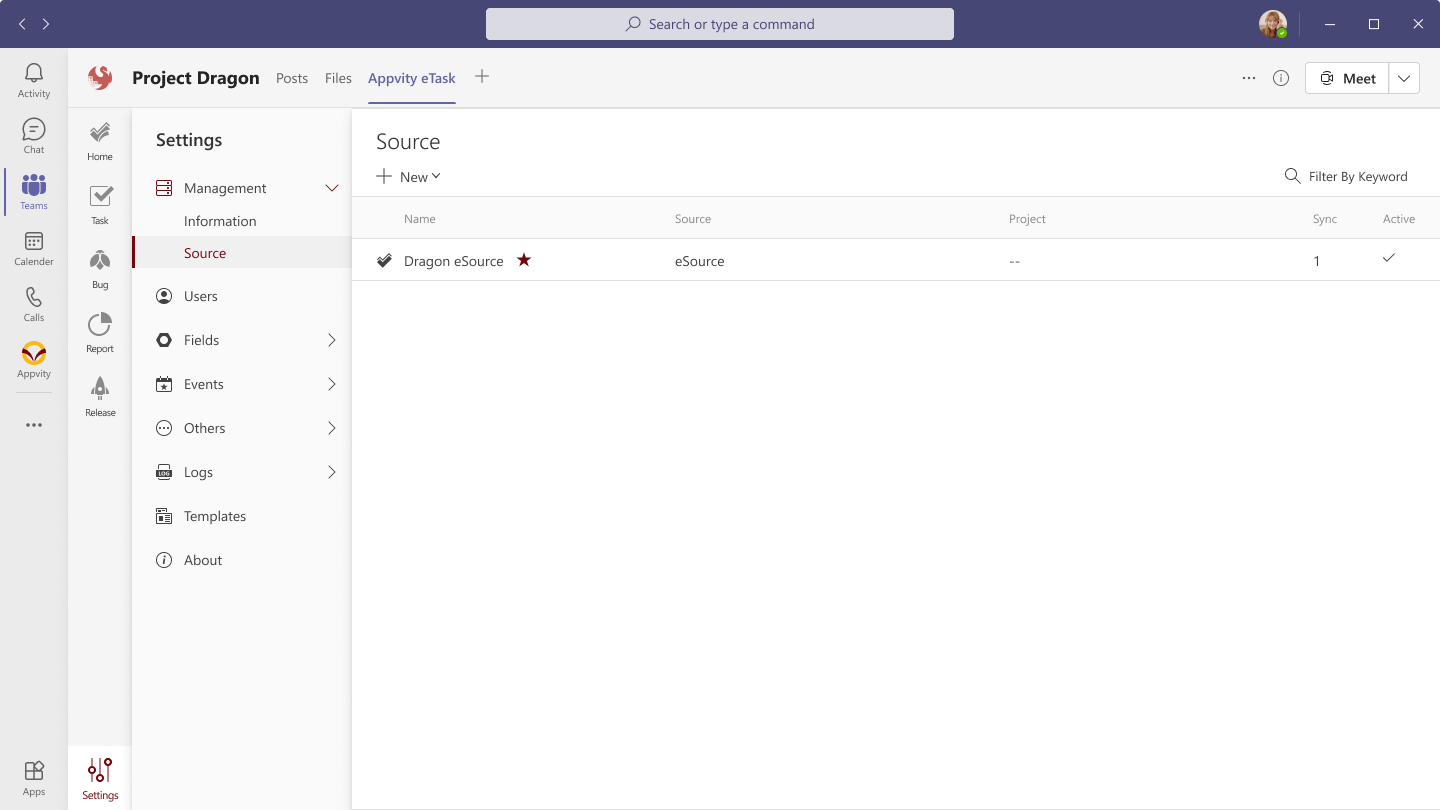
When you have finished Adding eTask into a Channel. The eSource is the only default that eTask provide.
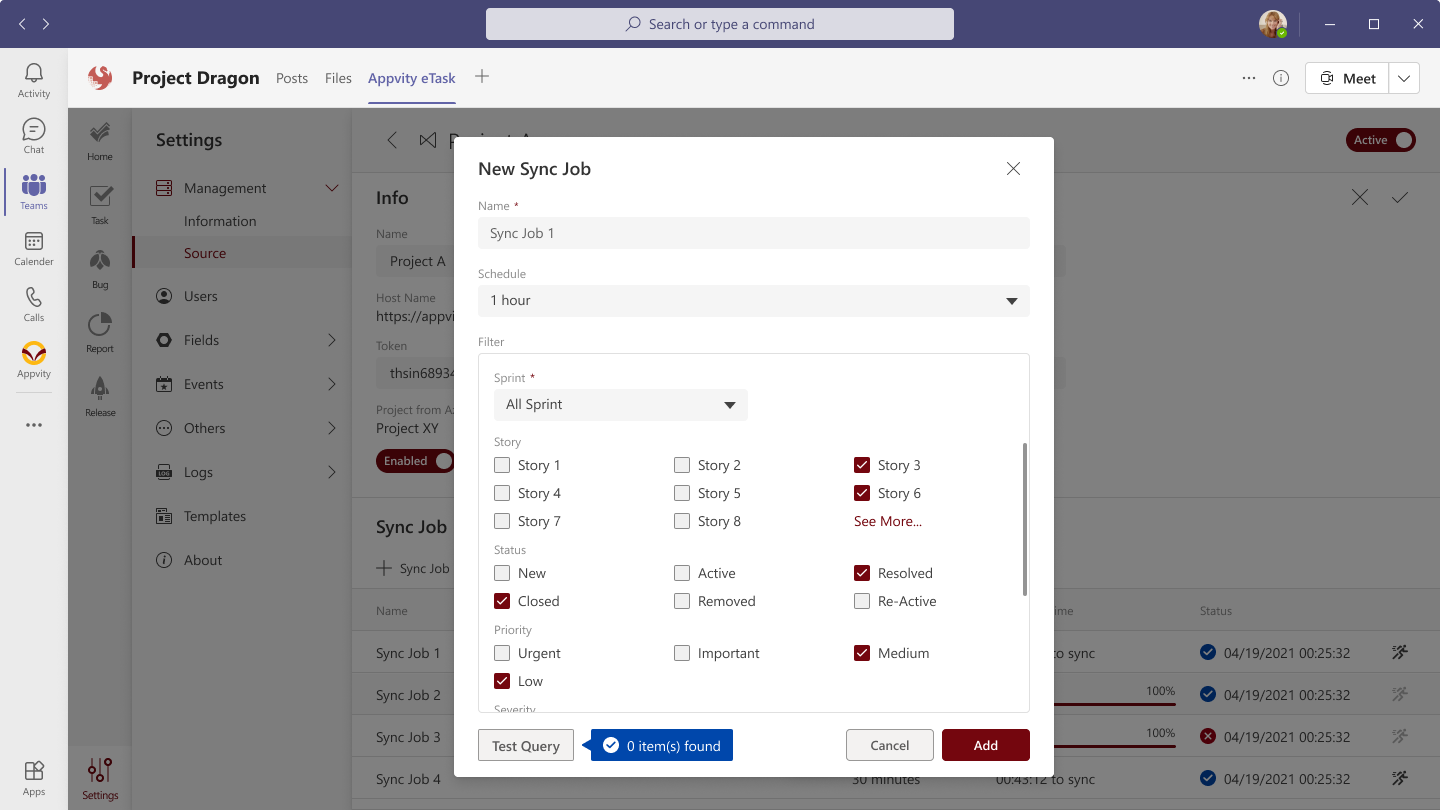
Sync Job is the automation progress that is used for updating data between Appvity eTask and external sources.
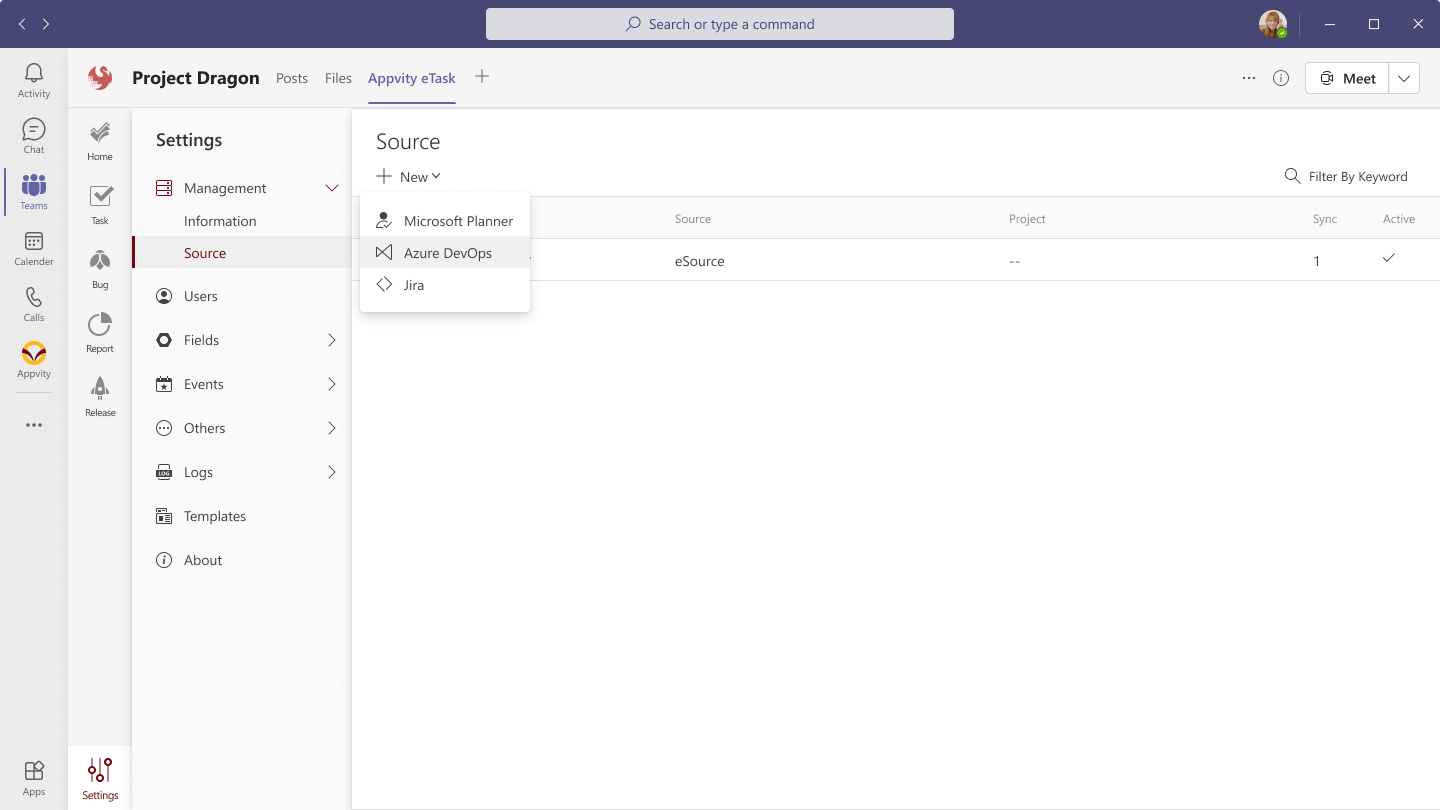
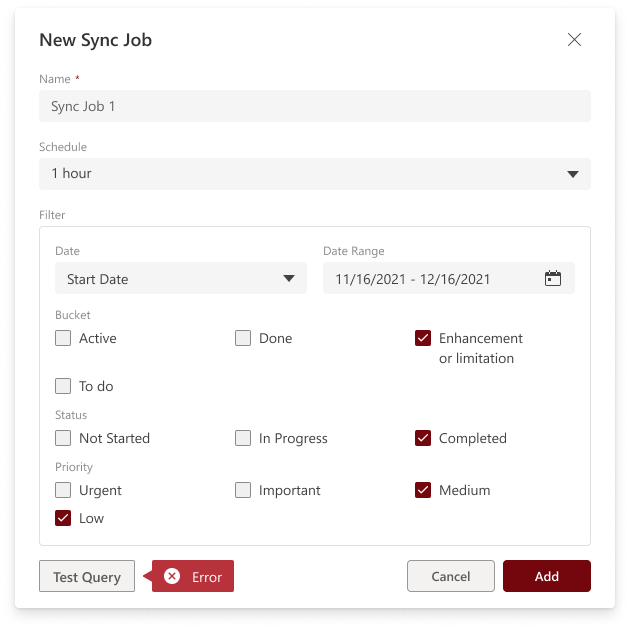
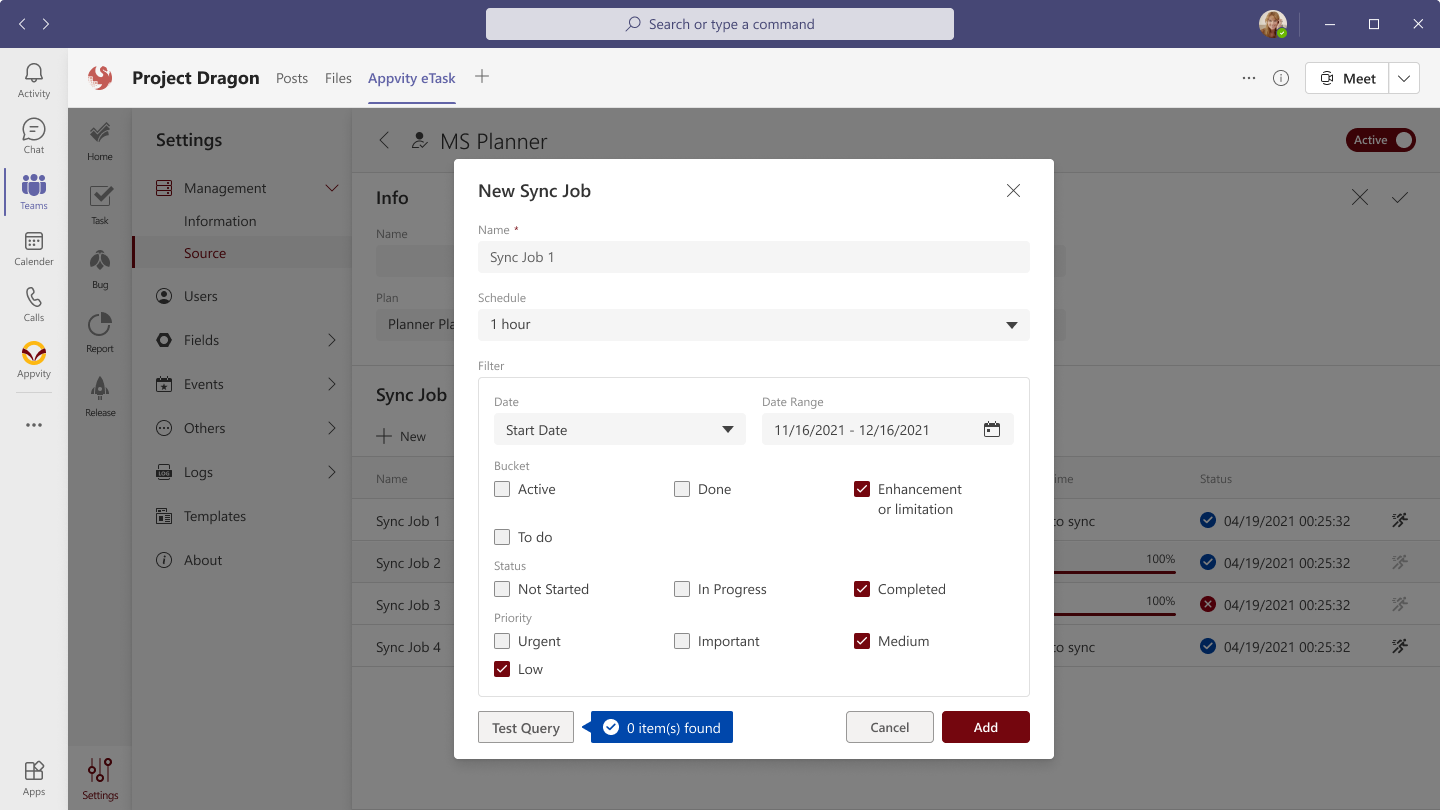
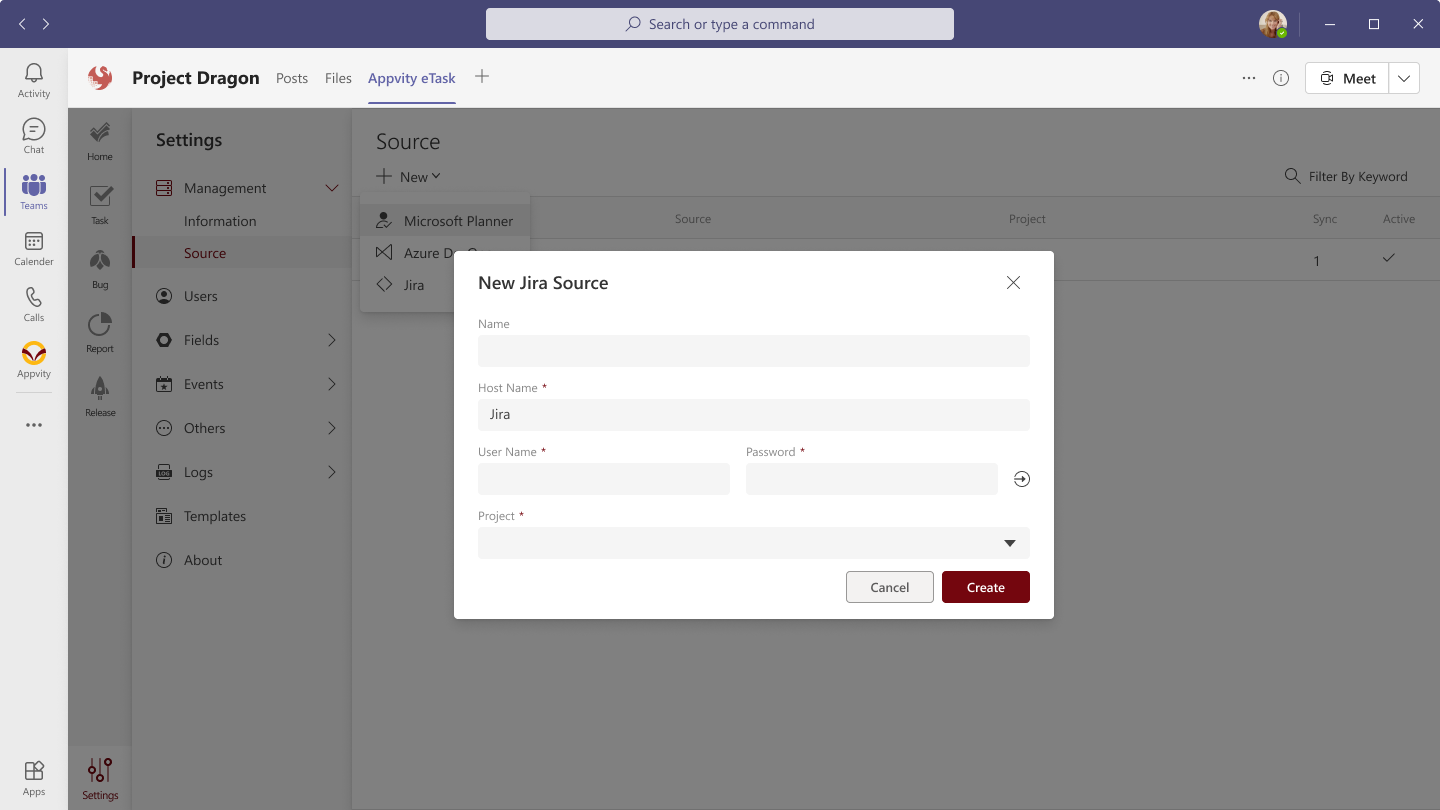
Setup the sync job for Microsoft Planner source:
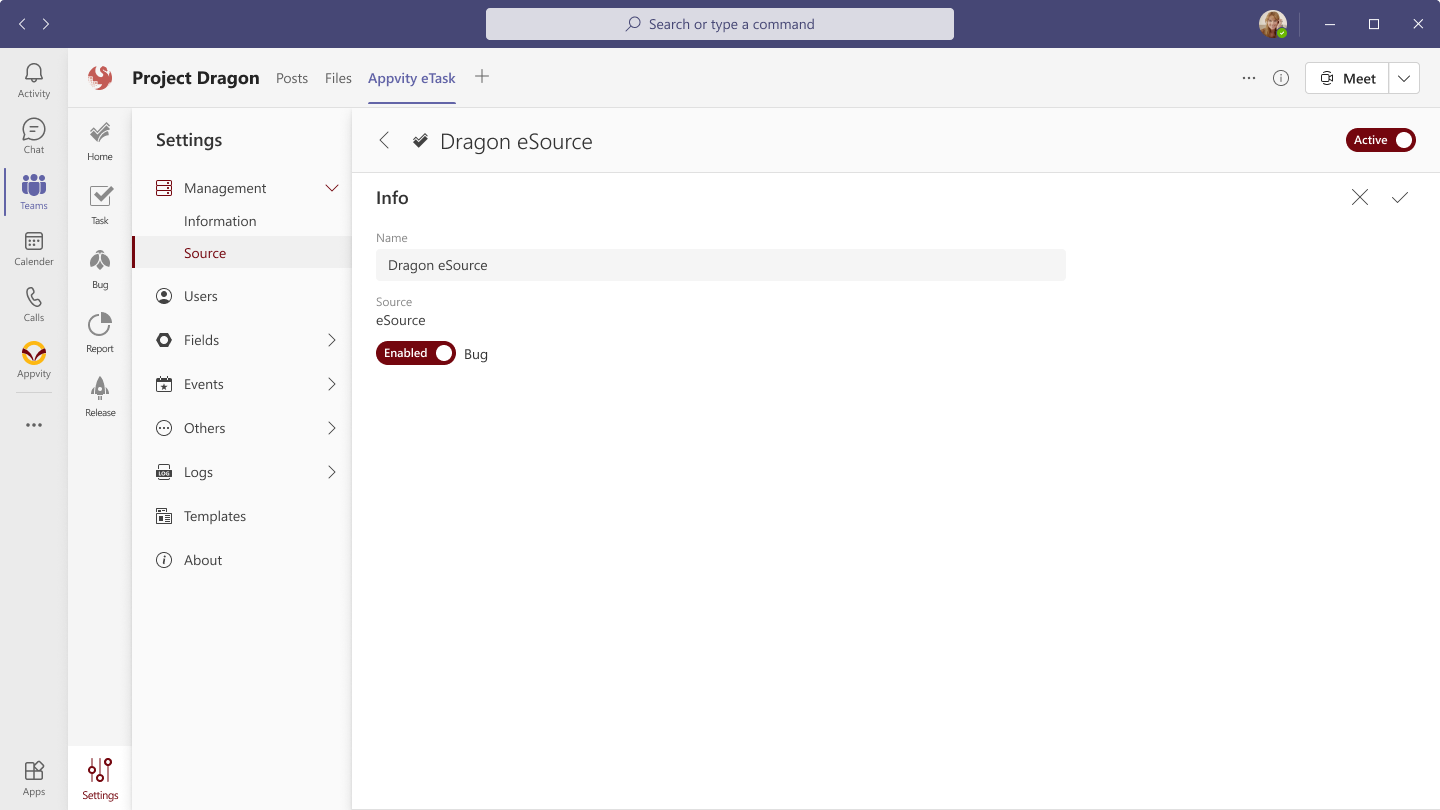
Name.
Schedule: The recurrent frequency of the sync job.
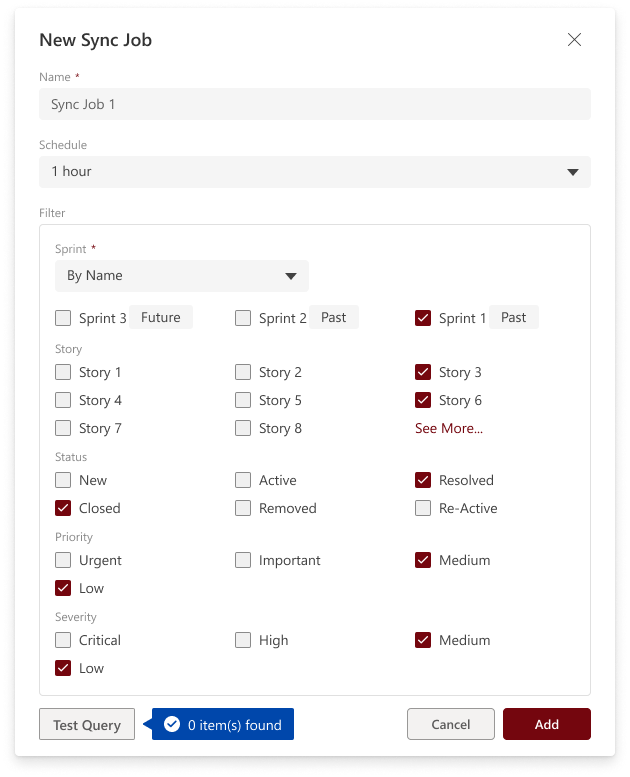
Filter:
By Date.
Bucket.
Status.
Priority. Note: unchecked all to get all the data in MS Planner.
Test Query: eTask will start the sync progress (have not get the data yet) to check whether the filter above is correctly configured.
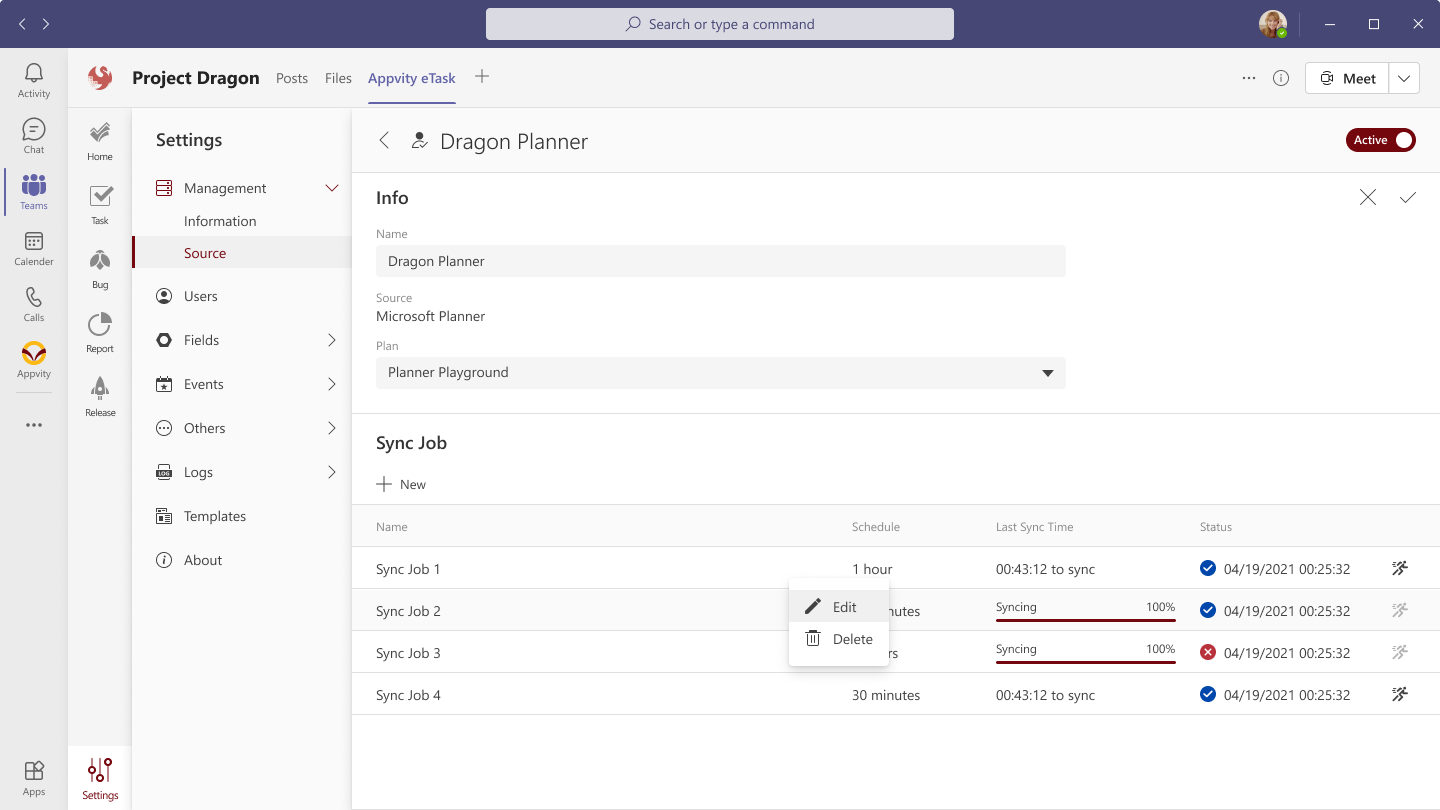
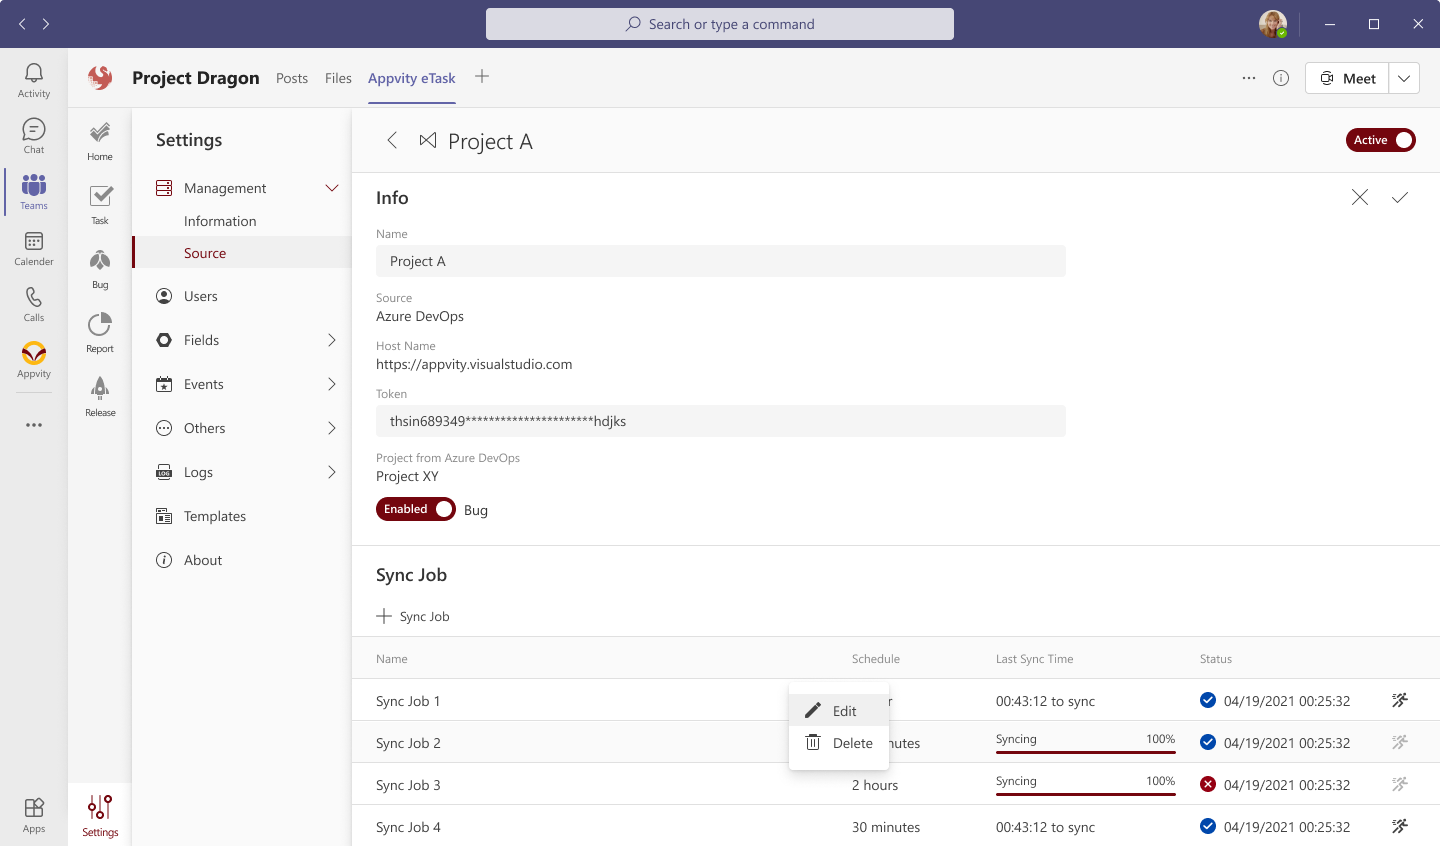
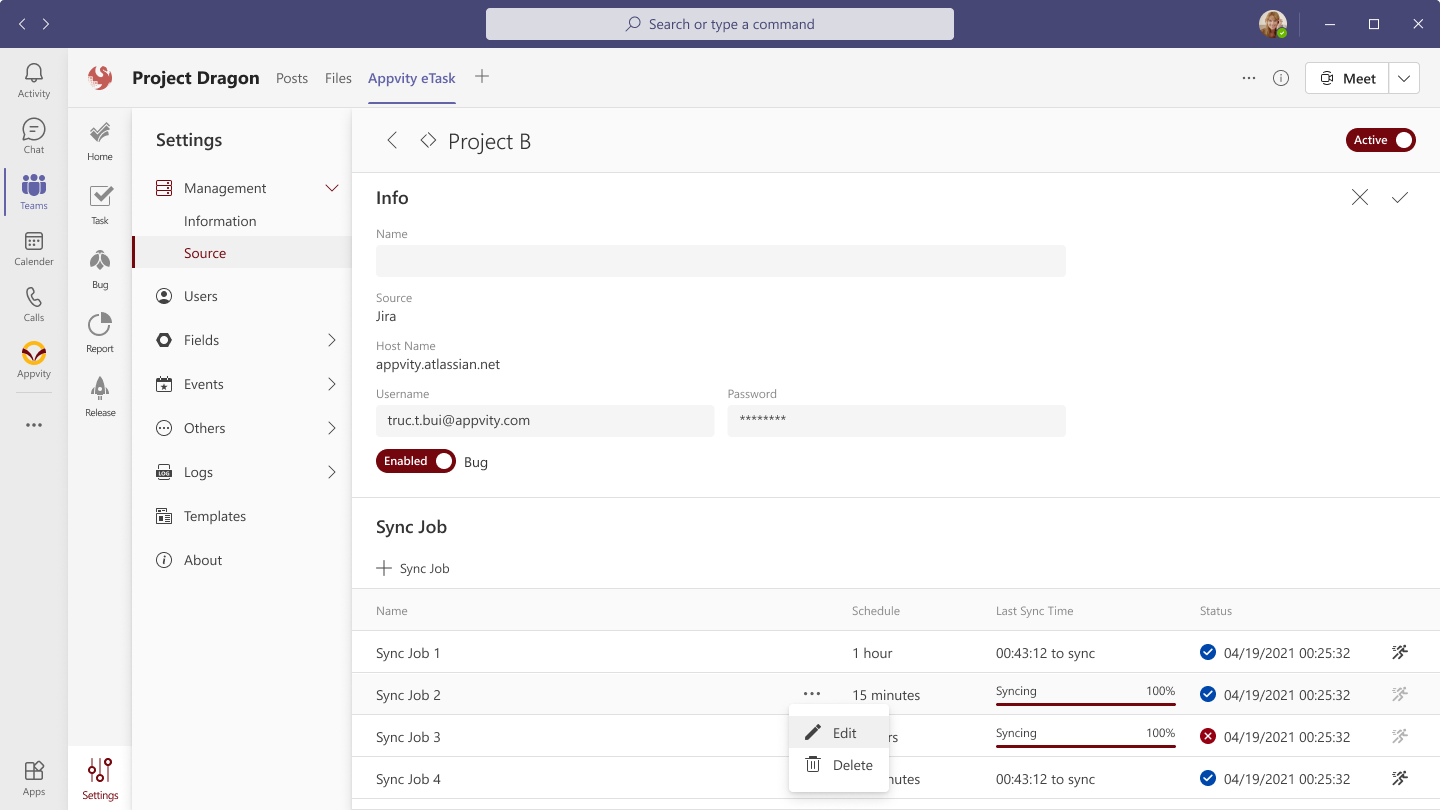
After adding the sync job successfilly, it will be shown in Sync Job table below.
The table will display:
Name of Sync job.
Schedule time.
Last Sync Time:
Time remaining until next sync.
Syncing progression bar status.
Status:
Success.
Failed. Note: there are several problems when the sync job is failed such as permission access to project, project is deleted in Planner, or any filtered field in sync job is removed from Planner, …
Button “Sync”: To start synchronizing.
You can “Edit” or “Delete” the sync job in action menu.
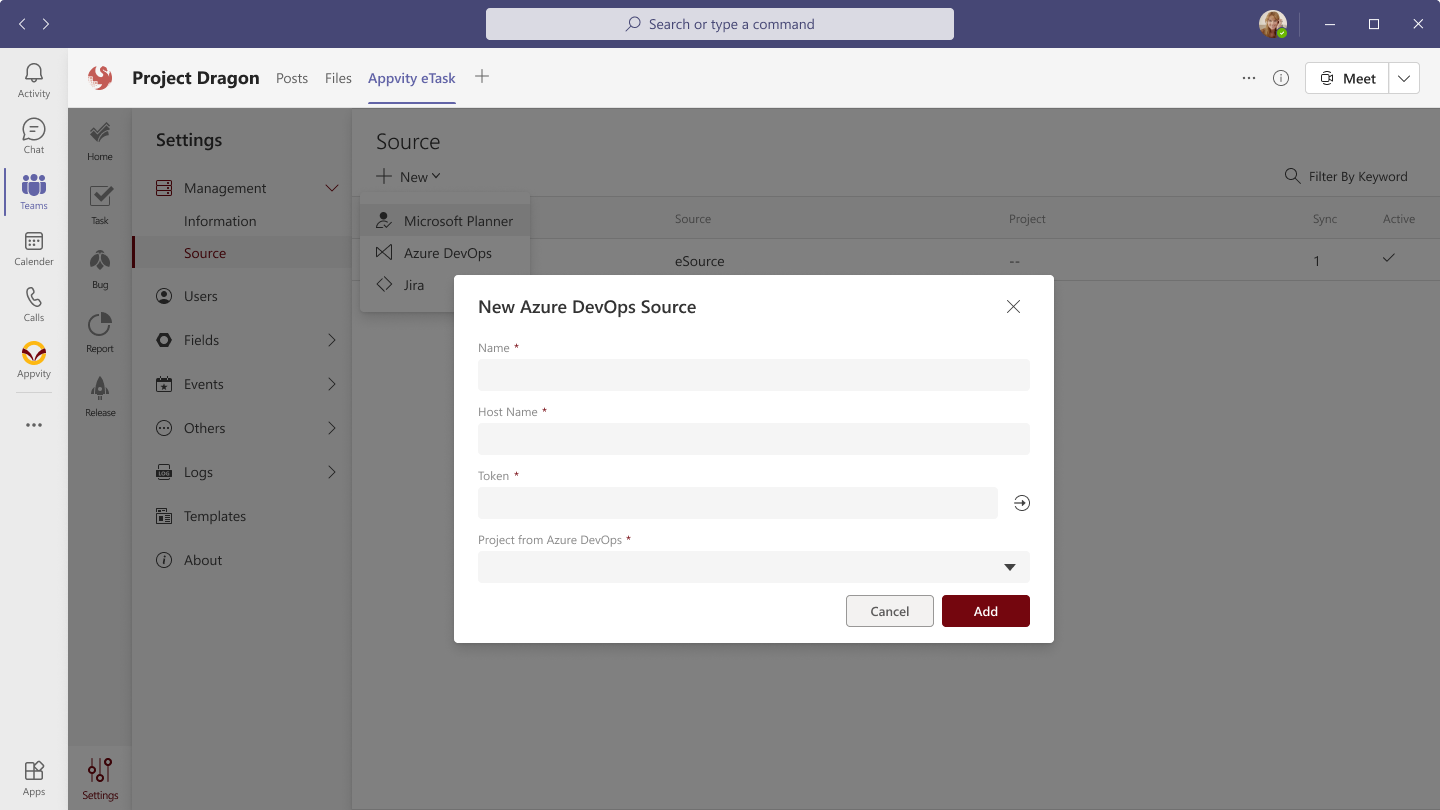
The Azure DevOps projects will be loaded from O365 users with the Personal Access Token needed. Make sure that the user has permission to access to the project fully.
Enter the name for Azure DevOps project: this name will be shown accros channel including in dashboard, filter, and forms.
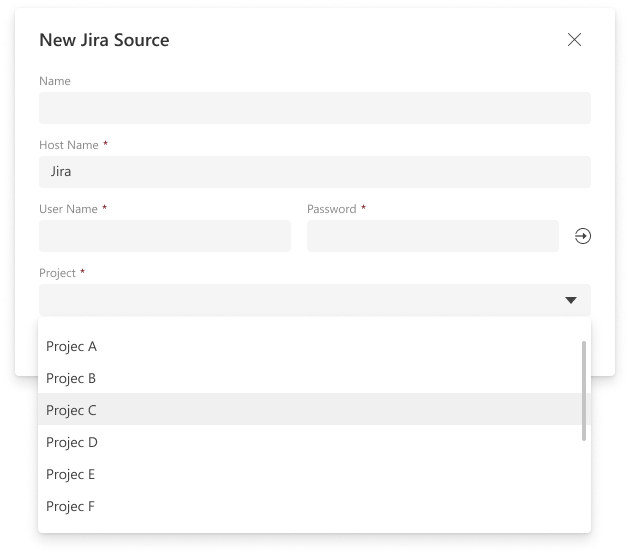
After added token, click to load the projects. Note: If the user does not have enough permission to access to the project, it will not be shown in project list below.
After adding the Azure DevOps source successfully, add the sync job to start getting data from external source.

 to load the projects.
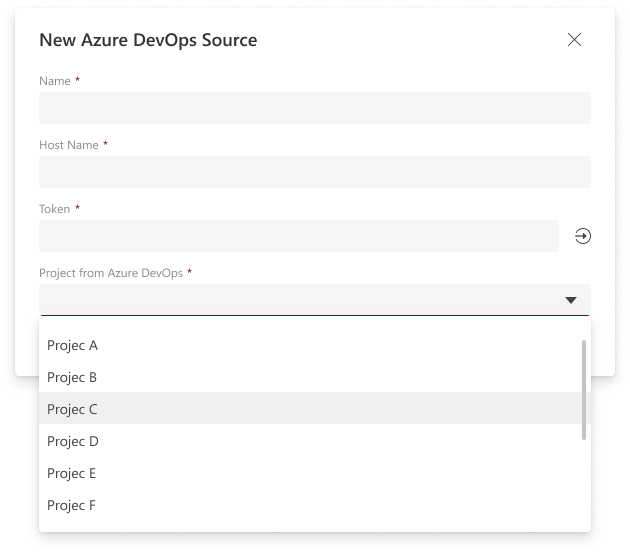


Comment